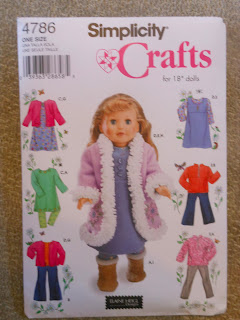
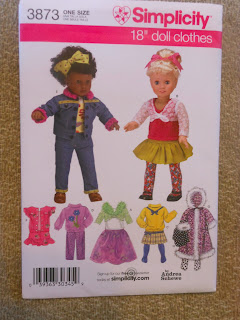
Here is the pattern I used. I used the shorts and the little top.
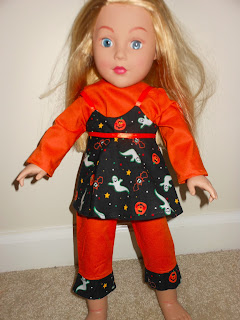
Here is the finished product. As you can tell the shirts were a little too short for my taste. The girls didn't actually wear these outfits. They didn't turn out the way I had envisioned.
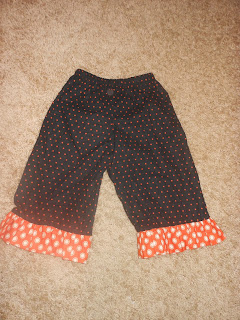
Here are the shorts. I originally cut the shorts a little longer to cover their knees. I had planned to put some elastic in them at the bottom to match Jasmine's poofy pants. The girls hated having the shorts so tight around their legs. I cut that off and just made shorts.
Here is the top. As you can see I really struggled with the ruffle around the bottom of the top. I couldn't get the corners to lay right. I kept sewing them up so finally I just gave up. It was a very disappointing outfit especially when I tried it on the girls and I could see their belly buttons. It is a cute outfit but not what I was going for. We decided to add it to their dress-up clothes.
Once again the fabric was on deep discount so I think I only spent $8 on this outfit.
Wednesday, October 30, 2013
Simplicity 1627 and Butterick 5777- Brave
Here is the pattern I used. For the top I used the Simplicity pattern.
For the shorts I used the Butterick 5777.
Here is the finished product. This pattern was a little harder. The top had a zipper under one arm. Of course I put one zipper in upside down.
Here is the back of the pattern. While I love the back detail, I didn't like the ribbon I ended up using. I had a very hard time finding a gold ribbon and one I finally did find was very stiff which didn't look nice in the end.
Here are the shorts. Once again they are basic shorts with a ruffle added to the bottom.
Here is a close-up of the top. I added a lace panel to the front and sewed on some decorative ribbon. Once again this is material I had never worked with before but once I started it was pretty easy to get use to the movement. I did find a really good sale on this fabric and I made these outfits for only $9 a piece.
The only thing I didn't like about this outfit was that the green was really too dark. A lot of people asked who the girls were suppose to be. When we took our picture with the princess from the movie Brave her dress was a very light green. The girls loved the outfits and they were comfortable walking around in them.
Butterick 4783- Sleeping Beauty
Here is the pattern I used. I used the red plaid outfit as my guide. I was an easy pattern.
Here is the finished product. I wanted to add a white collar of some kind but just couldn't figure out how to do that.
Here is the top. I added a V to the top and I used ric-rac. To the bottom of the top I added a sheer panel and then several triangular pieces that I had sewn ric-rac to the edges. With all that added material it really didn't lay right.
The shorts were basic sorts that I added a ruffle to the bottom with the sheer material. I then put some ric-rac around the ruffle seam to hide some mistakes I had made. This was the first time I had worked with the satin and sheer material. I was a little slippery but once I got use to that it was pretty easy. I do have to say that I found this material on clearance so the whole outfit only cost $10 to make. The girls loved all the shine and sparkle!
McCalls 6064 and Simplicity 2167
Here is the pattern I used for this outfit. For the pants I used the McCalls pattern and for the top I used the Simplicity pattern. These were pretty easy patterns.

Here is what I ended up with. Since we went to Disney in October I thought it would be cute to do an orange and black Mickey outfit. I think this outfit was one of my favorites.
Here are the pants. They were basic pants with an added ruffle.
Here is a picture of the top. I added four Mickey heads to the top and bottom of the top and just sewed around them. I also added a string of sequins where the top meets the skirt part of the top. This outfit was also pretty easy. The hardest part was the sequins because they had to be hand sewn on. I did this while I sat and got chemo.
Simplicity 2377- Snow White Swim Cover
Here is what I got. I bought two $1 towels from Walmart for the yellow, one blue towel for $1 and two light blue hand towels for $.75. So the total for each swim cover was only $3.75. I serged all the edges after I cut out the pattern because this type of fabric sheds EVERYWHERE!!!! I also struggled to attach the skirt to the top so I sewed the skirt to a piece of elastic which caused the skirt to make the gathers. Then I just sewed the top on to the elastic.
For the yellow and red stripes I used some ribbon I already had and just sewed them on. I think this only took 3 days to finish. The girls loved having these to wear to the hotel pool. They got lots of compliments on how cute they were. The good thing about these is that they will be able to wear them next summer.
Sunday, August 25, 2013
McCall's 6270
It has been a while since I last posted. I haven't been sewing due to moving into our new house. I do have a few projects that I finished before the move but never posted. Here is one of them.
Here is the pattern I used for this shirt. I actually made this shirt a year ago but it was huge on Abby.
It was fairly easy but I wish I would have taken the time to use pink thread in my serger. I don't know if you can tell but the ruffles have white thread on the underside. I love the colors in this shirt because they look so good on Abby.
Sunday, March 24, 2013
Simplicity 2348
I used this pattern:
Here are the dresses:
I love the little bow detail at the neckline. I used snaps so I could take them off while I washed the dress. The belt actually ties in the back into a cute little bow.
Here is a picture of the girls trying out the pockets:
Of course I had to make matching dresses for their American Girl dolls. While they don't match exactly they are pretty close.
Thursday, March 7, 2013
McCalls 6059
Here is what it looked like finished. I love this fabric and wish I had bought more of it. Unfortunately I only had enough for a top for Kaylee and her doll.
I used this pattern for the doll. I used the pink and green polka dot long shirt and just didn't add the sleeves. I also didn't have enough fabric to make shorts so I just made the top a little longer.
I didn't have enough fabric to make shorts so I just made the top a little longer. Of course I couldn't just make a dress for Kaylee's doll so I made one for Abby's doll with the fabric switched.
I also made the shoes and headband to match. They turned out really good expect the girls can't keep the shoes on their dolls. Next time I will have to make them a little tighter.
Kaylee loves her new outfit! She is already asking what I am making next.
Thursday, February 7, 2013
McCalls 5835
So here is something I made for Abby recently. I didn't have enough fabric to make Kaylee a shirt too but I did have enough to make an outfit for each of the girl's American Girl dolls. I love that I now have something to use up those leftovers.
Wanting to make a matching shirt for the girl's doll I used this pattern. I used the picture on the top right hand side and just eliminated the sleeves. It too had a u shaped neck. I really had a hard time attaching the neck to the shirt.
The outfits also needed shorts so I used this pattern for the shorts.
Here is what the final product looked like. I also made the headband to match.
I also made the sandals on their feet. Our dolls came with shoes but they don't fit. I saw something like this online and I just knew I could copy it. The girls love the shoes!
Here is one happy little girl! She is already asking what outfit I am making for them next!
Sewing for dolls
I have been busy sewing but not all of it is for my girls. I have ventured into the world of American Girl doll clothes. I have to say that it is very different than sewing for a large child. The seams are so much smaller! I thought I would show everyone what I have been sewing.
My niece has an American Girl doll so I decided to sew 12 outfits for her for Christmas. I wanted to do one per month.
The first one is for the month of January. Since it is typically cold I decided to sew a coat and a hat. I used a fleece vest I had that had a stain. The butterfly applique was cut off of an old dress of Kaylee's that she had outgrown.
Here is the pattern I used.
For February I made a pair of pants with a black top.
Here is the pattern I used for the shirt. (The first picture)
Here is the pattern I used for the pants.
For March I made a dress. In this picture the dress was a little long. I did try to hem it up a bit.
Here is the pattern I used. This pattern was slightly disappointing and didn't fit very well.
For April I made this dress. You may remember the fabric from the girl's birthday skirts.
Here is the pattern I used. I tried making the hat but that was a complete bust! It ended up in the trash!
Here is May's dress. The fabric was left over from the girl's Disney shirts. The black shirt is the same one I made for February's outfit.
Here is the pattern I used. I used the blue dress. This was my favorite pattern.
Here is June's dress. I used the fabric from the girl's Disney shirts.
Here is the pattern I used.
Here is July's outfit. You may recognize the material. I used it for the girl's 4th of July outfits. I loved how this turned out.
Here is the pattern I used.
Here is August's outfit. Since it is baseball season I wanted to make an outfit that would work for a Cardinal game. The fabric came from a baseball dress I made the girls.
Here is the pattern.
Here is September's outfit.
Here is the pattern I used. I used the dress in the top left corner. I also used this for the red turtleneck.
Here is October's outfit. I used some material that came from the girls Halloween dresses.
Here is the pattern I used. I wasn't a fan of this pattern and struggled with both the top and the pants.
Here is the outfit for November. The fabric is from the girl's Thanksgiving dresses.
Here is the pattern. I used the dress in the top left corner.
Here is December's outfit. I used material from the girl's Christmas skirts. The shirt is the same as above. It is a pleated skirt.
Here is the pattern. I used the yellow and blue outfit.
So there you have a breakdown of all the outfits I made. I hate throwing away fabric and have been keeping most of my larger left over pieces for just this. Now I can start working my way through my stash. I have to say the whole time I was sewing these outfits, the girls were super excited. I told them after Christmas I would sew them outfits too.
My niece has an American Girl doll so I decided to sew 12 outfits for her for Christmas. I wanted to do one per month.
The first one is for the month of January. Since it is typically cold I decided to sew a coat and a hat. I used a fleece vest I had that had a stain. The butterfly applique was cut off of an old dress of Kaylee's that she had outgrown.
Here is the pattern I used.
For February I made a pair of pants with a black top.
Here is the pattern I used for the shirt. (The first picture)
Here is the pattern I used for the pants.
For March I made a dress. In this picture the dress was a little long. I did try to hem it up a bit.
Here is the pattern I used. This pattern was slightly disappointing and didn't fit very well.
For April I made this dress. You may remember the fabric from the girl's birthday skirts.
Here is the pattern I used. I tried making the hat but that was a complete bust! It ended up in the trash!
Here is May's dress. The fabric was left over from the girl's Disney shirts. The black shirt is the same one I made for February's outfit.
Here is the pattern I used. I used the blue dress. This was my favorite pattern.
Here is July's outfit. You may recognize the material. I used it for the girl's 4th of July outfits. I loved how this turned out.
Here is the pattern I used.
Here is August's outfit. Since it is baseball season I wanted to make an outfit that would work for a Cardinal game. The fabric came from a baseball dress I made the girls.
Here is the pattern.
Here is September's outfit.
Here is the pattern I used. I used the dress in the top left corner. I also used this for the red turtleneck.
Here is October's outfit. I used some material that came from the girls Halloween dresses.
Here is the pattern I used. I wasn't a fan of this pattern and struggled with both the top and the pants.
Here is the outfit for November. The fabric is from the girl's Thanksgiving dresses.
Here is the pattern. I used the dress in the top left corner.
Here is December's outfit. I used material from the girl's Christmas skirts. The shirt is the same as above. It is a pleated skirt.
Here is the pattern. I used the yellow and blue outfit.
So there you have a breakdown of all the outfits I made. I hate throwing away fabric and have been keeping most of my larger left over pieces for just this. Now I can start working my way through my stash. I have to say the whole time I was sewing these outfits, the girls were super excited. I told them after Christmas I would sew them outfits too.
Subscribe to:
Posts (Atom)


